MOSAICS - How To Make Your Own Mosaic Table Top

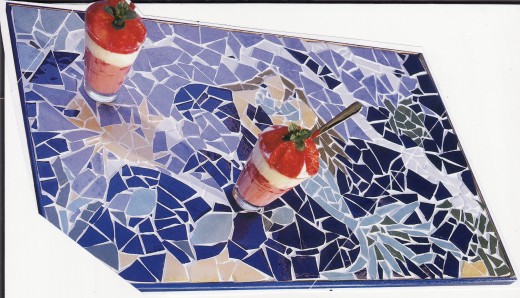
Completed Project
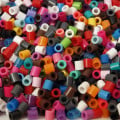
Mosaics - Materials Checklist
Mosaic work is unique, colourful, creative and fun.
With this project I’ll show you how to create a tabletop that will be a unique expression of your creativity. Your design is not that important as simply mixing coloured tiles together can be very appealing. Or, you can follow a geometric or more elaborate design – whatever takes your fancy.
Another great thing about doing your own Mosaic work is that you are able to rejuvenate what may an old or disused piece of furniture. A suitable table may even be found very cheaply at a charity or ‘op’ shop. For this project all you need is a solid table top.
The tiles are easily sourced as well. Take a quick visit to a local tile supplier as they generally have broken, discontinued or oddment tiles that are able to be bought very cheaply. Be sure to select tiles that are the same general thickness so that once all tiles are in place and grouted there will be no sharp, jutting edges to contend with. The ideal situation is to select tiles that will sit at the same height when the project is complete.
MATERIALS CHECKLIST
A table - assorted tiles - old towel - tweezers - tile underlay, cut to size (optional) - construction adhesive (eg. liquid nails) - tile adhesive - grout (in desired colour) - clean rags - edge trim or beading - tile cutters or nippers - wooden rule - hammer - PVA glue - safety glasses - grout squeegee or sponge - bucket - clean water.
Getting Started ...
STEP 1 - BREAK THE TILES
Before you begin you need to decide on a theme for your design. Once decided, select your tiles to suit the colours you will need to create your design.
Put your safety glasses on. Break your tiles by placing them face down on a towel, covering the tile back with the tile (in effect, wrapping the tile in the towel), then striking with the hammer. Try to create 20mm to 40mm pieces. Do NOT pulverize the tile.
STEP 2 – PREPARE THE TABLETOP
If you are using a timber table make sure that you sand it back a little to create an even surface for the adhesive to adhere to properly. If your tabletop is plastic, metal or laminate you will need to cover the original table top with the tile underlay. Adhere the underlay to your table top using some construction adhesive and allow it to dry before attempting to work with a new surface.
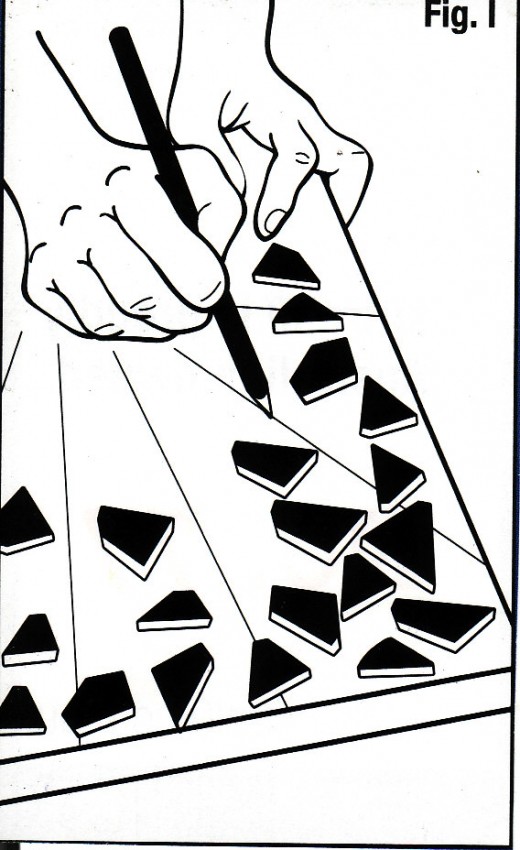
STEP 3 - LAY OUT YOUR TILES
Draw your design on the table top, making sure to take the time to get the lines and shapes right. Once you are happy with the design begin filling in the patterns by ‘dry-filling’ the fragments in place. Do not leave more than 5mm or so between the tile pieces and don’t sit the tiles too closely side by side as the grout will not be able to penetrate properly. Wearing your safety glasses, use the tile nippers or cutters to trim tiles to size. Take the time to ensure that your tile fragments are the right shape and size.
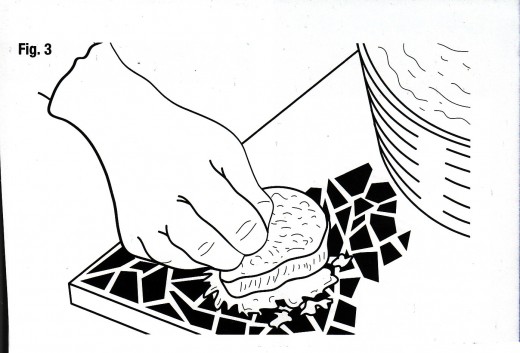
STEP 4 - PLACING THE TILES
Once you have completely covered the tabletop with tile pieces in the design of your choice, it’s time to start gluing. Begin in one corner and work with one tile fragment at a time. Use your old knife or filling blade to apply tile adhesive to the back of each tile piece. Press the tile firmly onto the table top, being careful not to squeeze the adhesive out from under the tile. Continue in this way until all the tiles have been stuck down, using the tweezers to work with small or fiddly tiles. Once all the tiles are down use your wooden rule (ruler) to check the level of the new surface you’ve created. Press down any raised or uneven tiles. You are aiming for a uniform levelled surface that will take the grout evenly.
Allow the adhesive to dry for at least 2 to 3 hours.
STEP 5 - APPLYING THE GROUT
Make up the grout mixture according to the directions on the pack. Apply the grout to the tabletop in sections, working the grout into the gaps between the tiles with a grout squeegee or sponge, ensuring that all gaps are filled with grout. Allow the table to sit for 10 to 20 minutes, then fill a large bucket with clean water and with a slightly damp sponge start wiping over the surface of the tiles to remove the excess grout. Rinse out the sponge constantly, keeping it fresh.
Once you are satisfied with the finish on your table top, leave the grout to dry.
STEP 6 - FINISHING OFF
Once the grout is dry you may see a slight haze over the tile surface. Use your clean rag to rub gently over the surface, polishing the haze off as you go.
Now the edges of your table need to be finished. Use some beading or trim wide enough to cover the old edge of the table and the new tiled surface.
STEP 7
Enjoy your new creation!
Last minute tips and tricks:
· If you find that your table top still has a few rough or sharp edges once your project is completed, use a small find to grind down the sharp edges. Be careful not to scratch the glaze on the main body of the tile.
· You may wish to wear gloves when working with the tile adhesive as this can be drying to the skin and may cause irritation.
· There are a great deal of different coloured grouts available, so take the time to consider which colour most suits your project.
GOOD LUCK WITH YOUR PROJECT!
· Personally, I do a great deal of mosaic work using river pebbles and stones ... Look out for some example Hubs to come ...
![300+ Mosaic Tips, Techniques, Templates and Trade Secrets [Paperback] by Fitz. [Paperback] Fitzgerald, Bonnie](https://m.media-amazon.com/images/I/51RQIrr0AnL._SL160_.jpg)